Back in late 2016, I backed the ESPRESSObin on Kickstarter. The board has three network ports attached to an internal switch, u-boot on SPI flash, a mini PCIe port for wifi/Bluetooth, and a SATA port to attach a hard drive. I had intended to do things with the board. However, due to the shipped u-boot lacking distro boot support and an extremely convoluted u-boot image build process, I left the boards I got sitting on the shelf for a long time. I filed a bug report with Marvell in 2016 to have them add support, and someone from OpenWRT commented that they had added support to build the images there. I ended up running OpenWRT on one of mine for a networking project.
The other two I figured I should get working with Fedora. I used OpenWRT’s u-boot though it is missing a patch that fedora has to look for the DTBs in multiple locations, and unfortunately, the DTB file in U-Boot is not enough for the system to boot. While copying the DTB files to the EFI partition works, it is not ideal. As a result I used information from how OpenWRT builds the images to be able to build them using the Fedora built U-Boot image. The U-Boot images, along with an RPM, SRPM, and specfile can all be found here. This is a weird corner case and is really something that should be shipped by globalscale, as such I have decided not to submit the package for review in Fedora. With that said, they work well, and Fedora works well on the boards
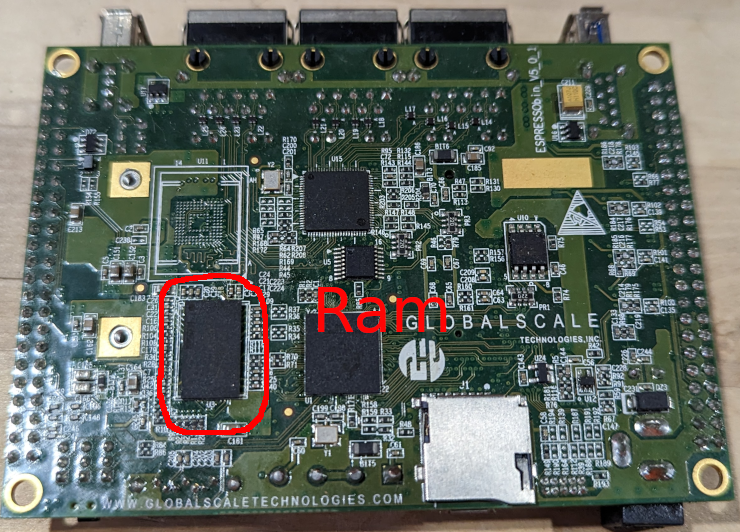
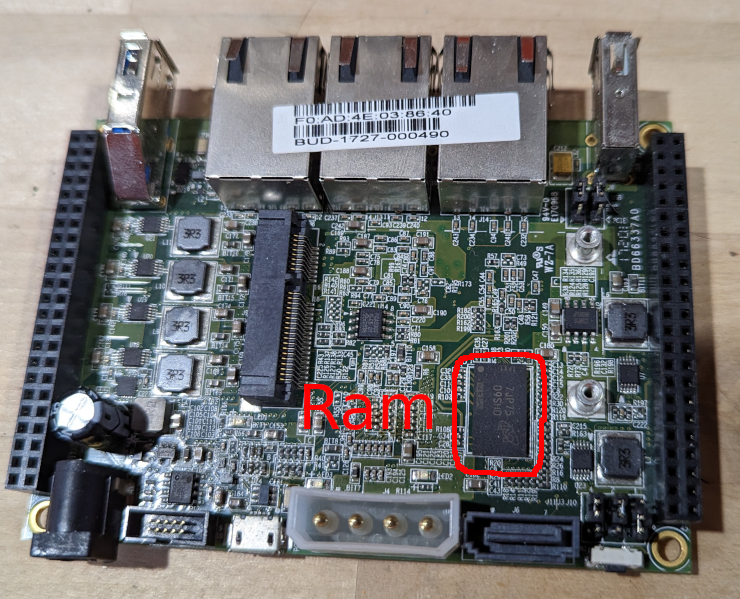
Choosing the right image to flash is not too hard. There are two different versions, v5 and v7; the big difference between the versions is the type of memory they have, DDR3 vs DDR4, and the SATA Power and data connections. You do need to pick the image configured for the amount of memory installed in your system; the one wrinkle is the V5 board has two different 1GiB versions, one that has one memory chip and one with two memory chips. The memory chip is close to the SATA data port. You need to use the version that matches the number of ram chips installed.
Flashing the image is straightforward, copy it to a fat formatted USB stick or an mSD card, insert the storage, power on the ESPRESSObin, and hit a key to interrupt booting when prompted. Once you have done that, run bubt with the arguments to flash to SPI. In my case, I ran bubt flash-image.bin spi mmc to flash the image flash-image.bin to SPI from mmc. Once you have flashed the image type reset to restart the board, and it will boot using the newly flashed U-Boot.
=> help bubt
bubt - Burn a u-boot image to flash

Usage:
bubt [file-name] [destination [source]]
        -file-name     The image file name to burn. Default = flash-image.bin
        -destination   Flash to burn to [spi, nand, mmc]. Default = spi
        -source        The source to load image from [tftp, usb, mmc]. Default = tftp
Examples:
        bubt - Burn flash-image.bin from tftp to active boot device
        bubt flash-image-new.bin nand - Burn flash-image-new.bin from tftp to NAND flash
        bubt backup-flash-image.bin mmc usb - Burn backup-flash-image.bin from usb to MMC
=> bubt flash-image.bin spi mmc
Burning U-Boot image "flash-image.bin" from "mmc" to "spi"
Image checksum...OK!
Erasing 1187840 bytes (290 blocks) at offset 0 ...Done!
Writing 1186304 bytes from 0x6000000 to offset 0 ...Done!
At this point, you can install Fedora on your preferred media. I am running Fedora 37 Server from SATA, you can install the image onto an mSD card using arm-image-installer, insert the card, and boot, using the serial console to complete initial-setup.
As I said, I am running from a SATA disk. As the Power cable setup is not exactly standard, it may take some work to power the drive. I have seen reports of people buying two different types of cables and splicing them together, in my case I was able to find a “2 Pack 4 Pin IDE Female Molex to Female Dual SATA Power Y-Cable Adapter” online, while it has 2 power cables and is longer than needed it works for power, looking for something to house it all I came across a blog post outlining a case with a 2.5″ Hard Disk, for my use I tweaked the case slightly so that I can mount it on screws on a wall, though I am considering moving to a DIN Rail setup to make management a little nicer.